Webflow Waitlist Integration
Why use LaunchList with Webflow?
Webflow is the go-to site builder for founders and designers who want full visual control. LaunchList pairs with it natively — drop in two lines of code and your Webflow site collects pre-launch signups with viral referral loops, position leaderboards, and spam protection built in.
What you get:
- Viral referral program — every signup gets a unique referral link that moves them up the waitlist
- Fraud detection — disposable email blocking, MX validation, and behavioral scoring on every submission
- Real-time leaderboard — shows your top referrers and drives organic sharing
- CSV export — download your full list any time
- Free plan — up to 100 submissions, no credit card required
Setup takes under 5 minutes. You will need a paid Webflow account to add custom scripts.
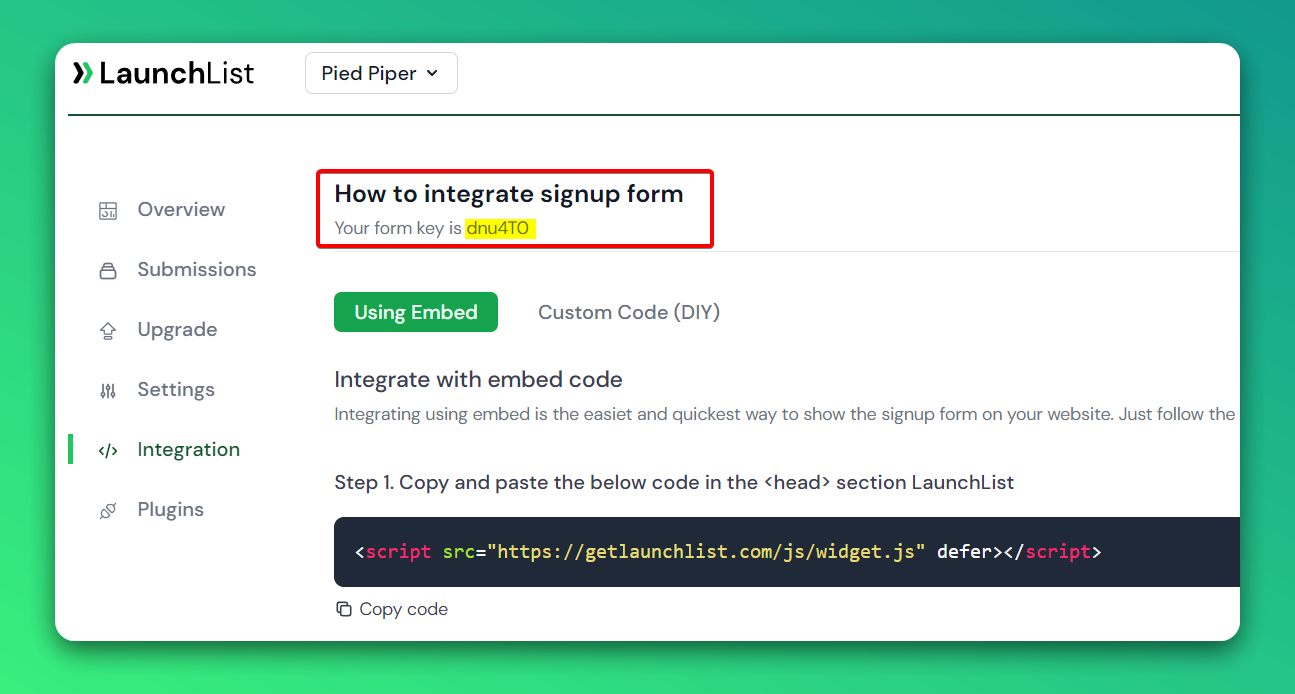
Step 0 - Get form key
To integrate the embed widget on the Webflow website, first, you need a LaunchList form key which you can get from the integration page.
Embed Widget
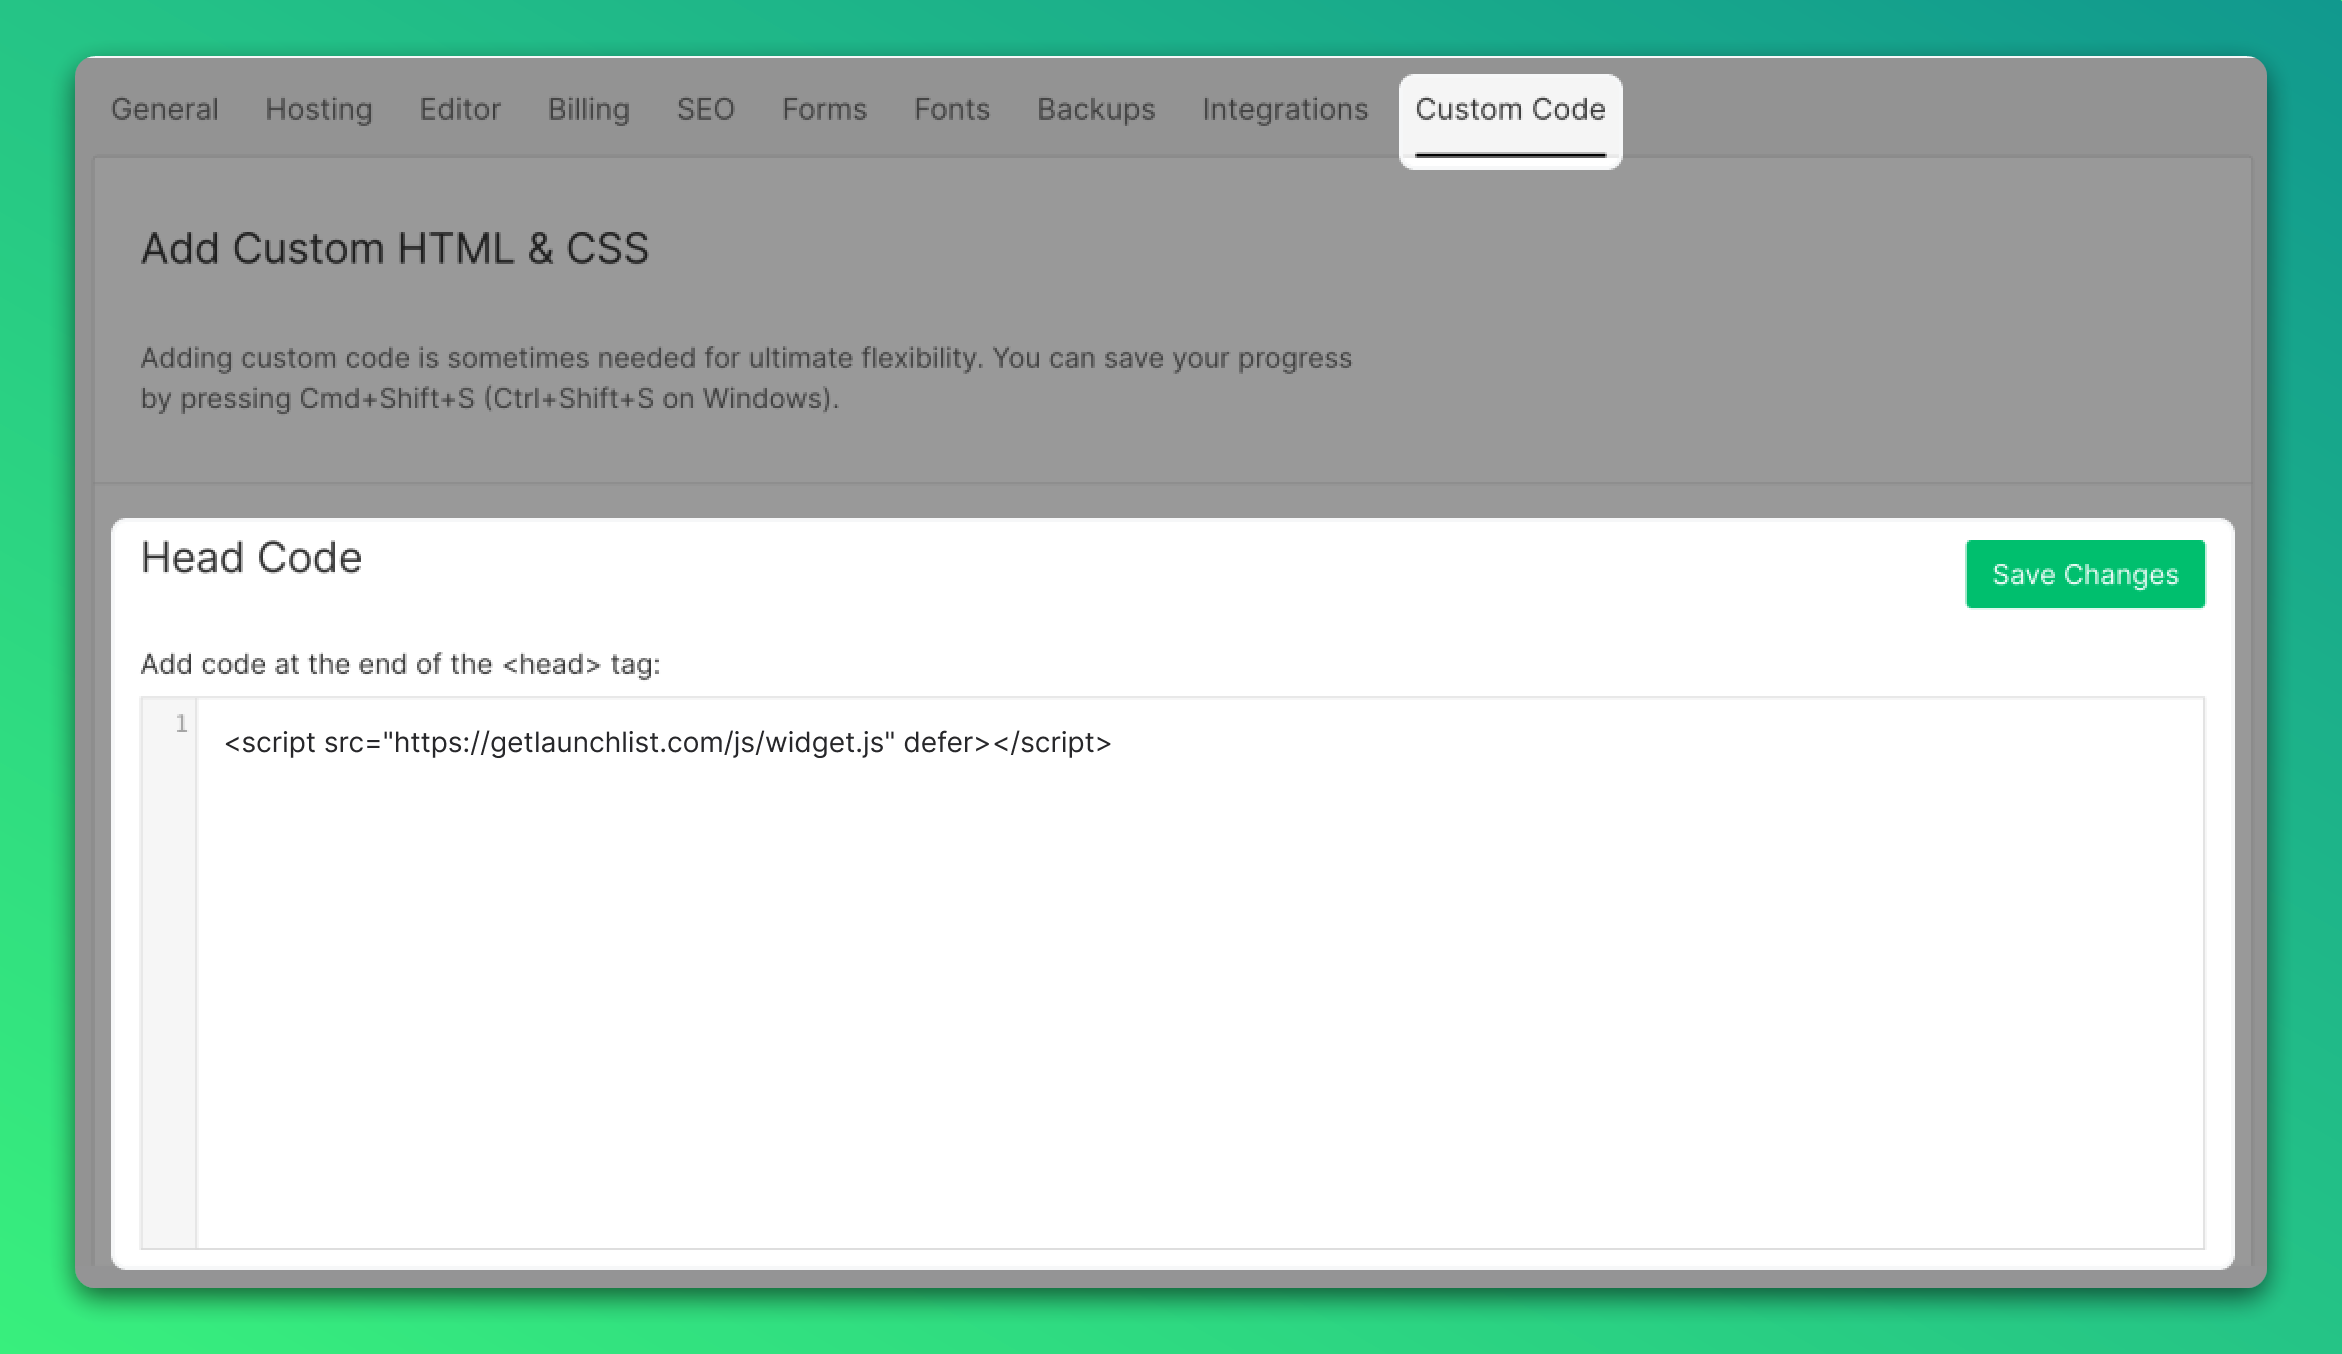
Step 1 - Add a widget script into <head> section
In your Webflow dashboard, go to Project settings > Custom Code, paste the below script into the Head Code section and save the changes. Or follow the instruction provided by Webflow.
<script src="https://getlaunchlist.com/js/widget.js" defer></script>
Step 2 - Add the form code into the Webflow embed element
- Go to Webflow designer
- Open the Add panel and add an Embed element to the Webflow canvas
- Paste the below code and save the modal
- Make sure you have replaced the FORM_KEY with your key from Step 0
<div class="launchlist-widget" data-key-id="FORM_KEY" data-height="180px"></div>

- Once saved, you'll see the widget on your Webflow website. Publish the changes to make it live.
Custom Form
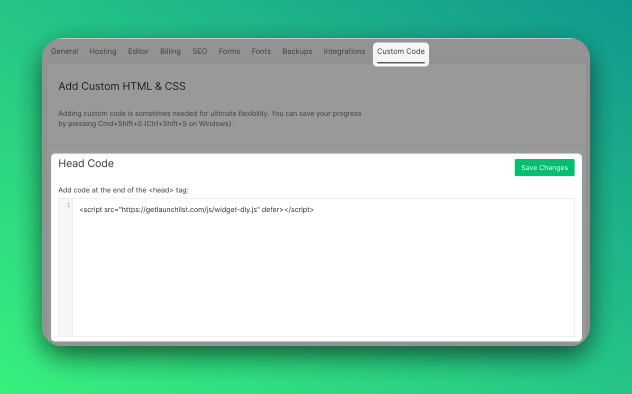
Step 1 - Add a widget script into <head> section
In your Webflow dashboard, go to Project settings > Custom Code, paste the below script into the Head Code section and save the changes. Or follow the instruction provided by Webflow.
<script src="https://getlaunchlist.com/js/widget-diy.js" defer></script>
Step 2 - Create a form in Webflow designer
On a designer canvas, click on the plus button to Add panel (A) and add a Form Block from the Forms section
 Drag a Form block onto the canvas where you want the form to appear.
 Or follow this tutorial to create a basic form. You can customize however you like. You can ignore the video after 2.30 minutes (Step 4. Success & error and Step 5. Form Submissions).
YouTube Link
Or follow this tutorial to create a basic form. You can customize however you like. You can ignore the video after 2.30 minutes (Step 4. Success & error and Step 5. Form Submissions).
YouTube Link
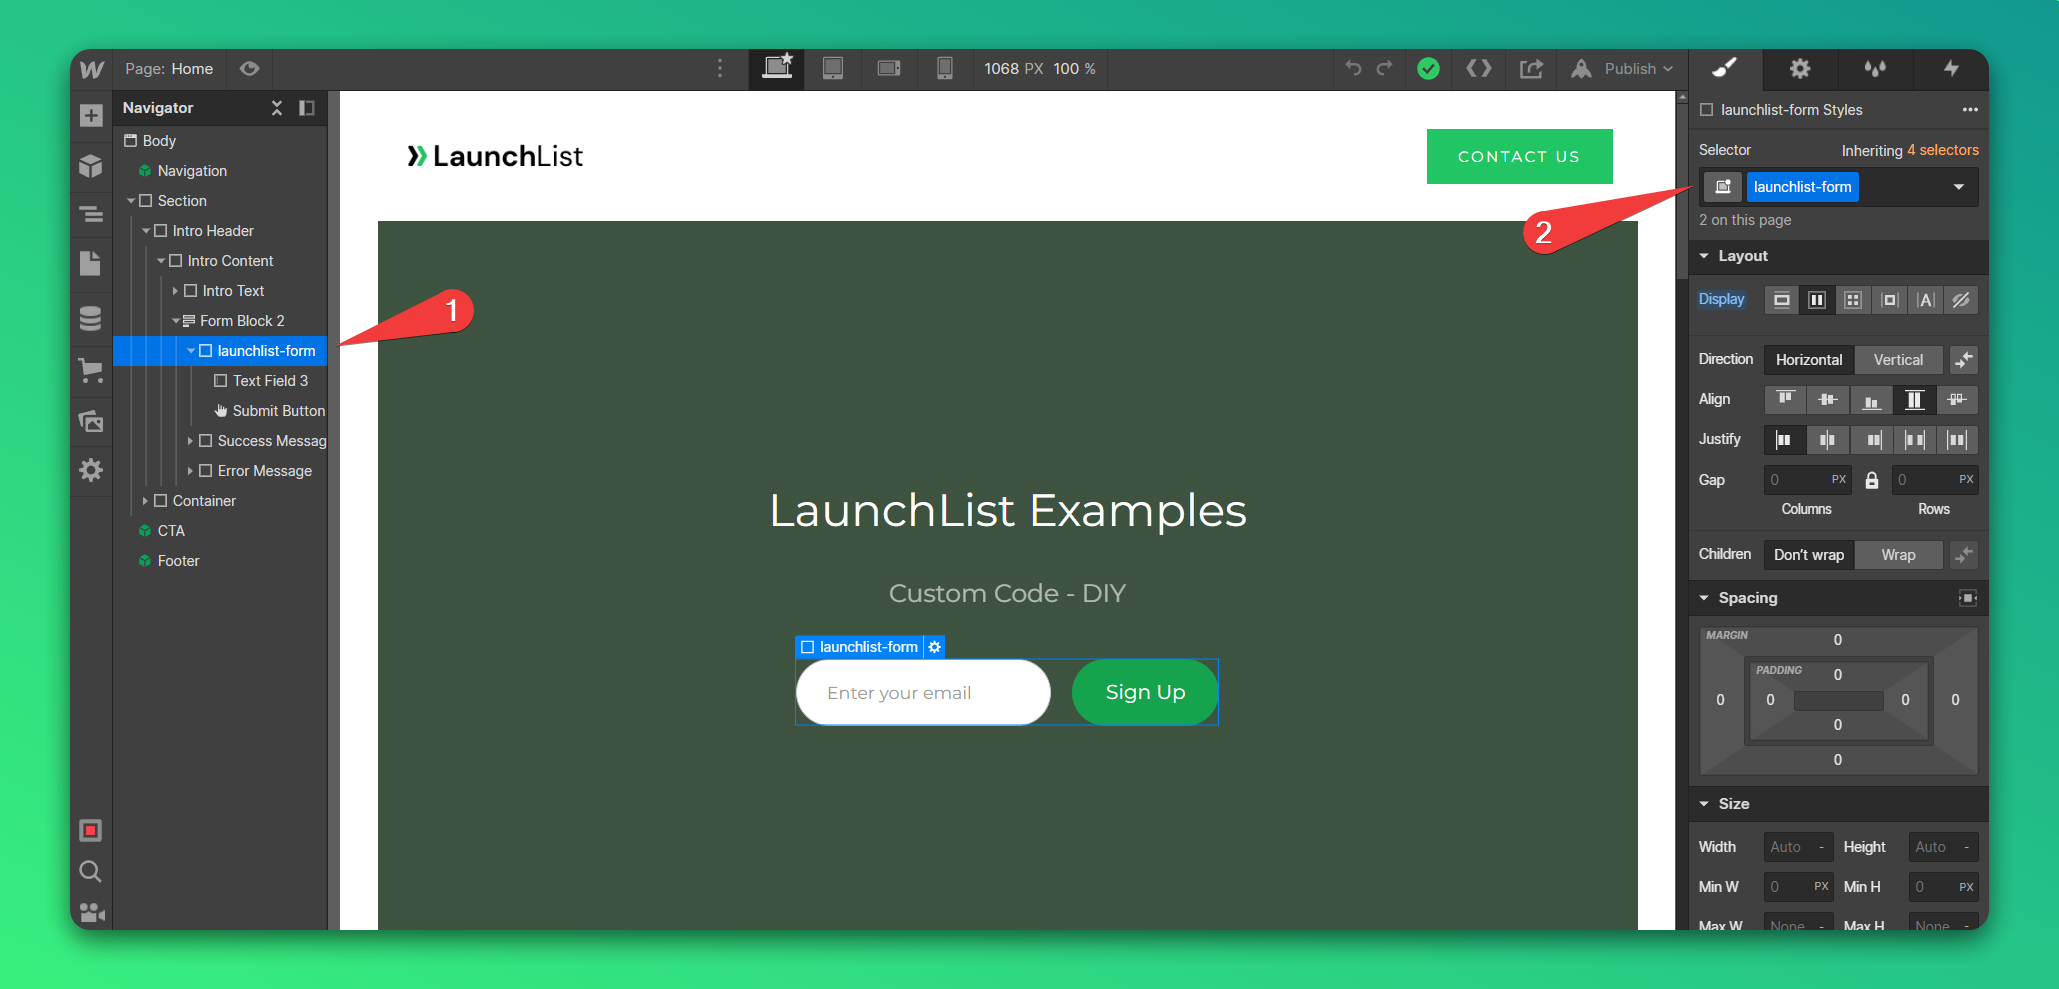
Step 3 - Add class to form
- Select your form from the elements navigator
- On the right sidebar, add a class launchlist-form on your form
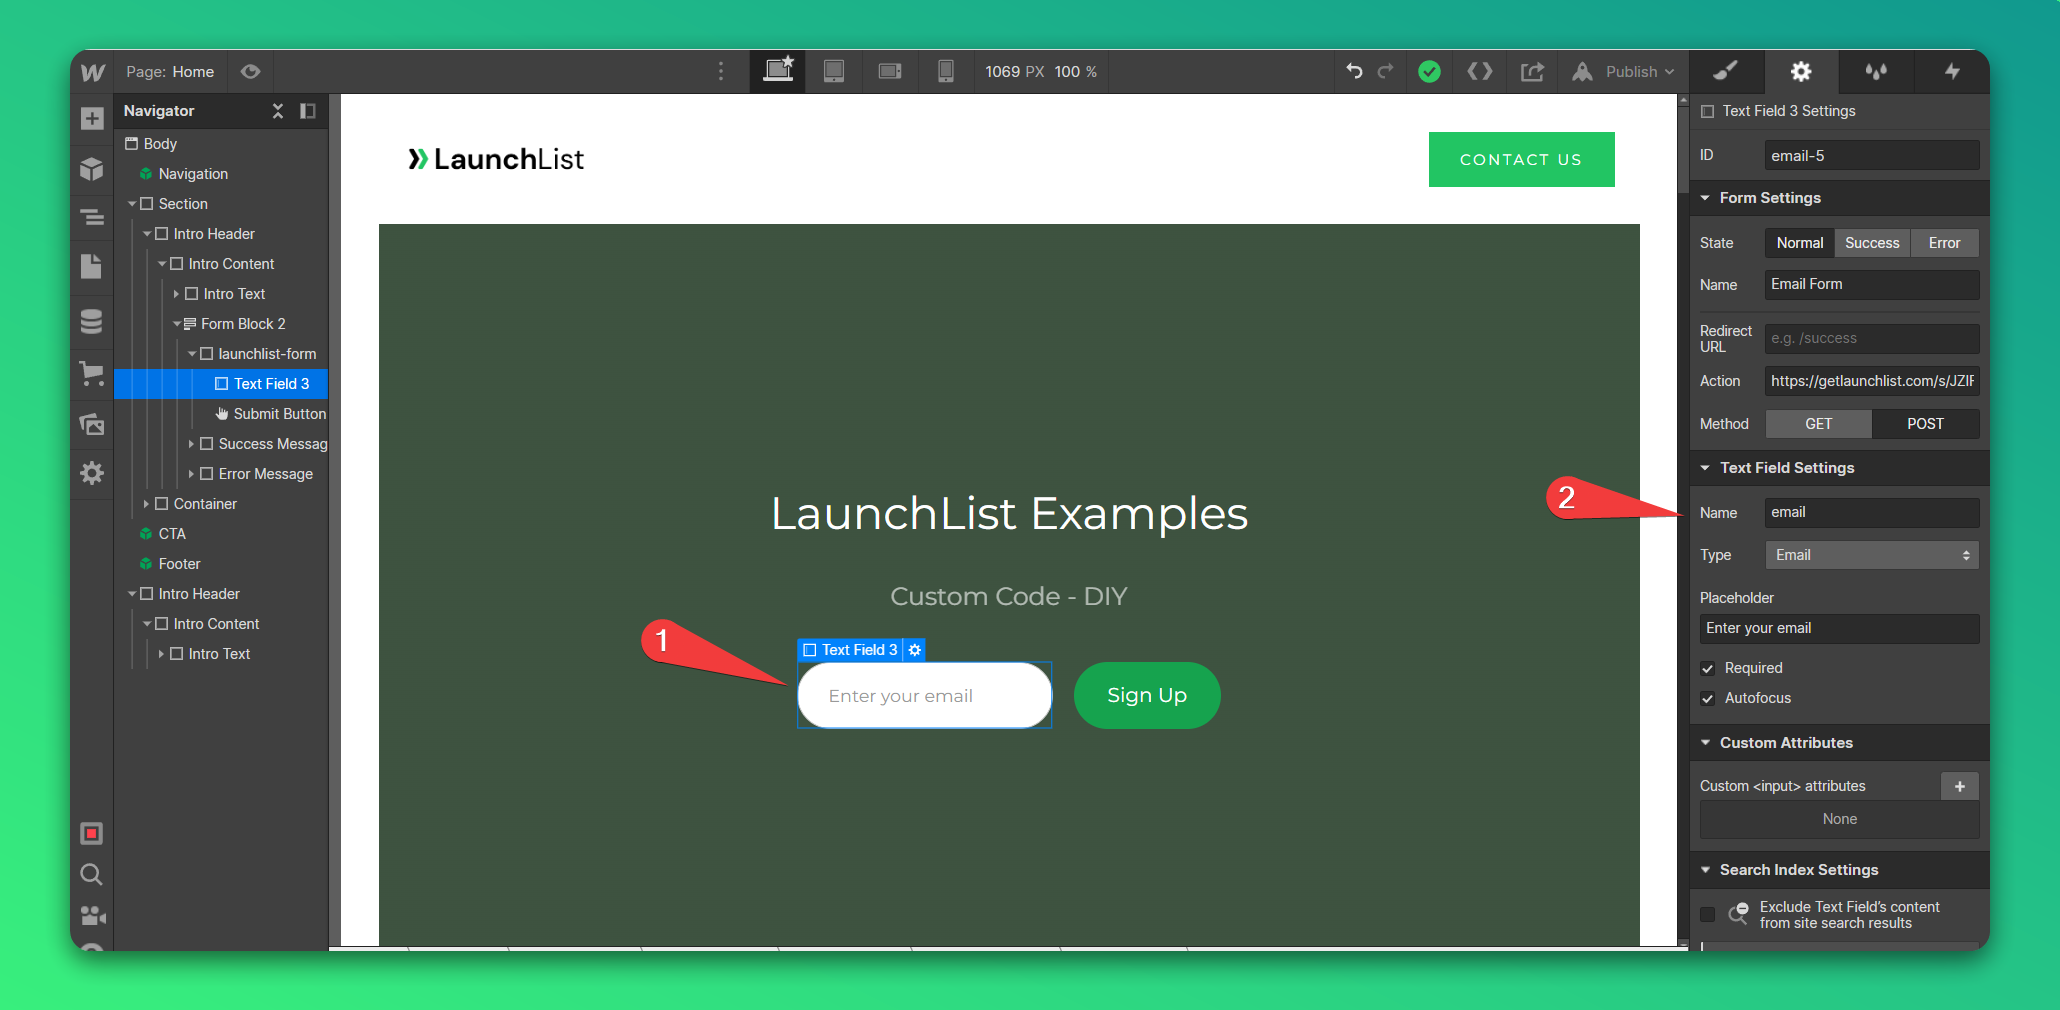
Step 4 - Set input fields name
- Select your form input from the designer canvas
- On the right sidebar, in Text Field Settings set Name of email input to email
- If you are using multiple fields, make sure you have a unique Name for each input
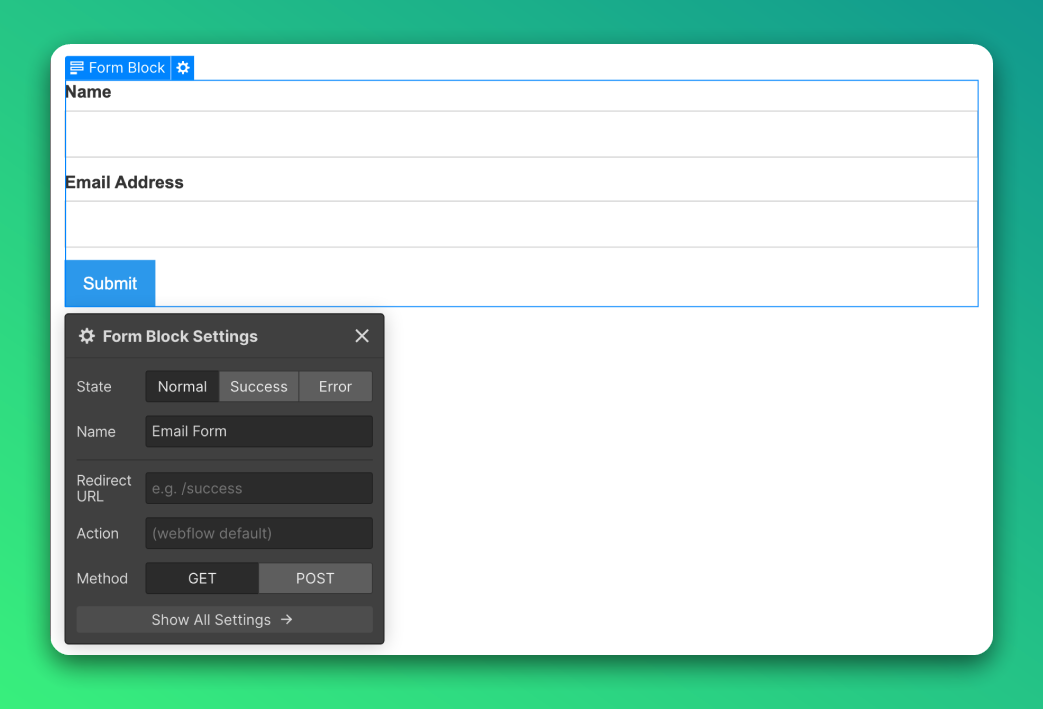
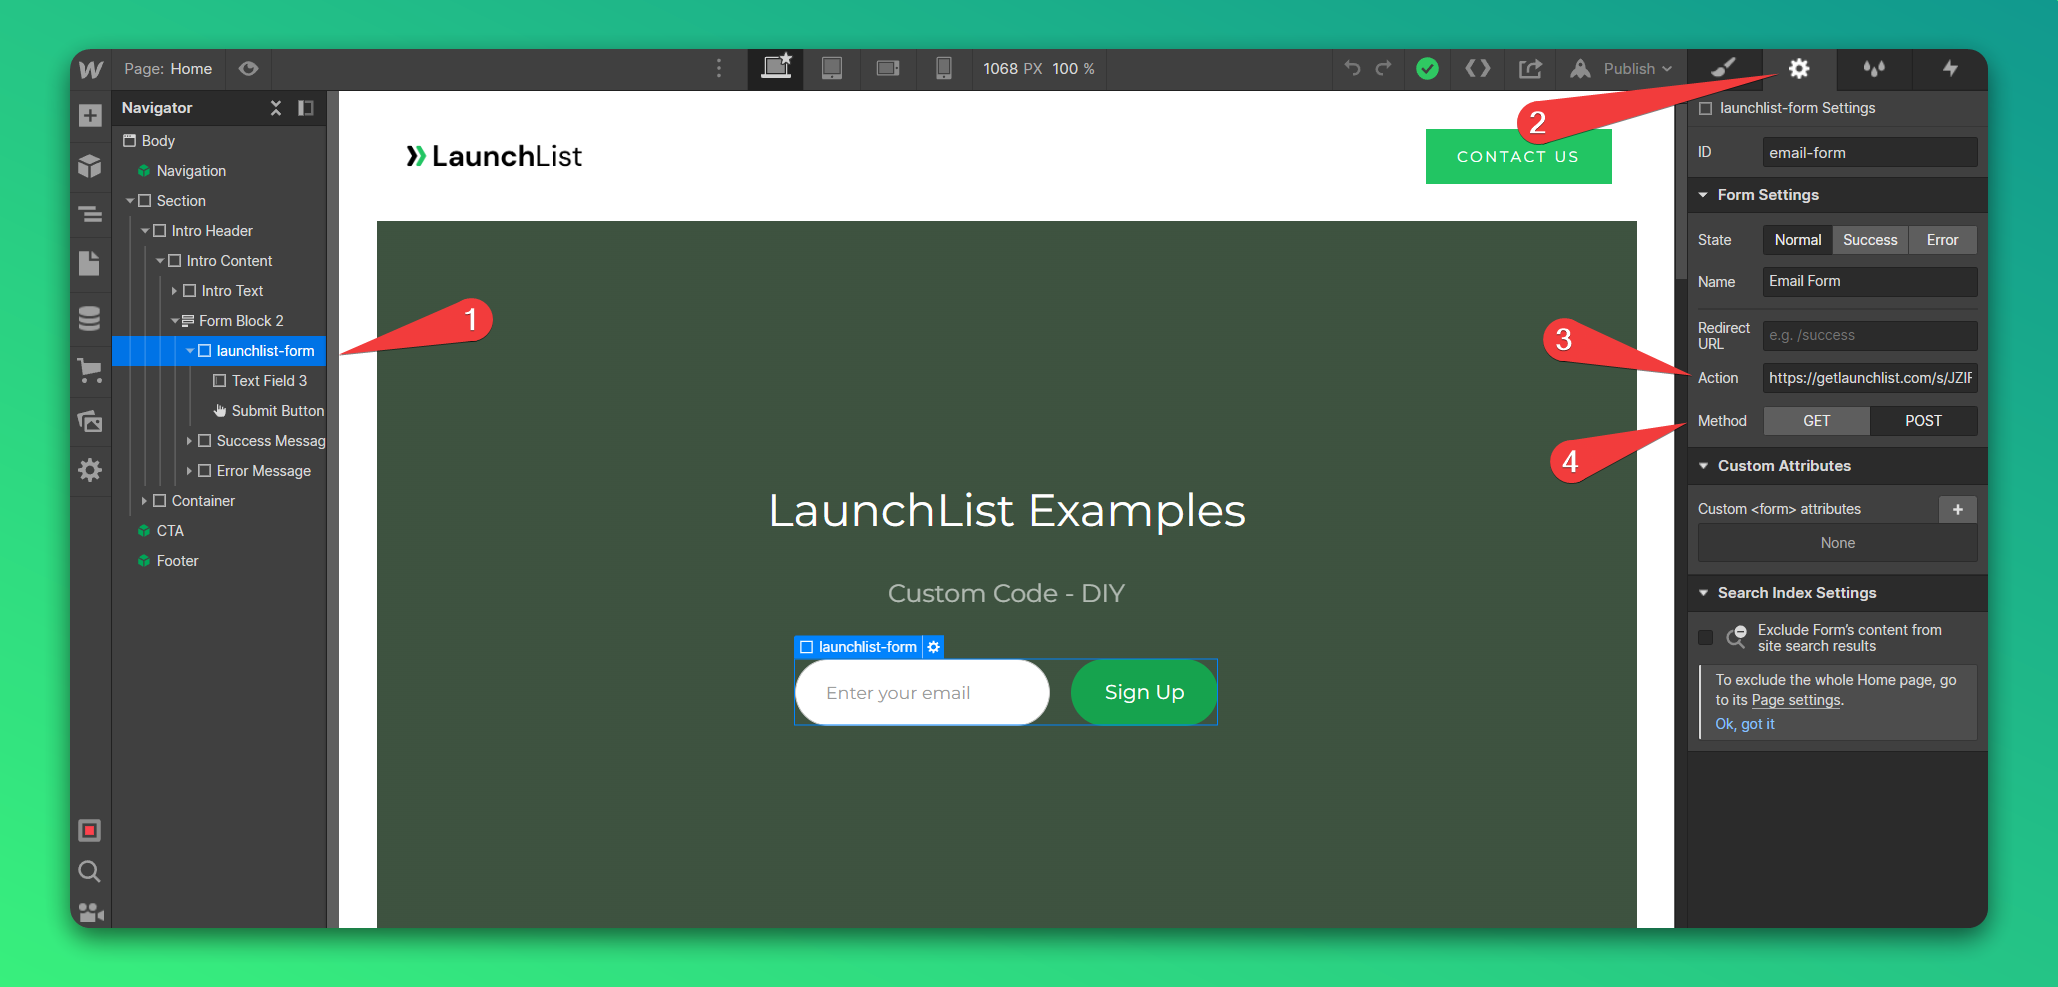
Step 5 - Point form action endpoint
- Select your form from the elements navigator
- Click on the Settings icon on the right sidebar
- On the Form Settings panel enter the below URL. Make sure, you replace the FORM_KEY with your form key from Step 0
https://getlaunchlist.com/s/FORM_KEY
- Choose the method to POST
Once saved, you'll see the widget on your Webflow website. Publish the changes to make it live.
GIF instruction